Article - 06
Publications Menu
Back to list of publications
1. The toothbrush tree
2. Fruits of the Fall
3. Gardening from afar
4. Herbal Harvest
5. The Joys of Wildcrafting
6. Working with Wood
7. Colours of Autumn
8.
9.
10.
Recipes and Poems
Recipes
Poems and Stories

Working with Wood


Smudging stick made from willow and kestrel feathers


Gorse fews made from living and dead wood


Wand decorated with ribbons and seashells

For the past two years, the last two Springfield Sanctuary workshops in October have been about the energetic properties of wood and making either ogham sticks or wands/meditation sticks. 

It’s best to gather wood from living trees when they’re asleep during the winter months or being pruned. Some can be gathered and worked fresh (holly and gorse are good for this) but most are better left to dry for at least five weeks before you try scraping or sanding them.

Fews 

I dropped into wood working quite by accident really. My first ever wand was a short
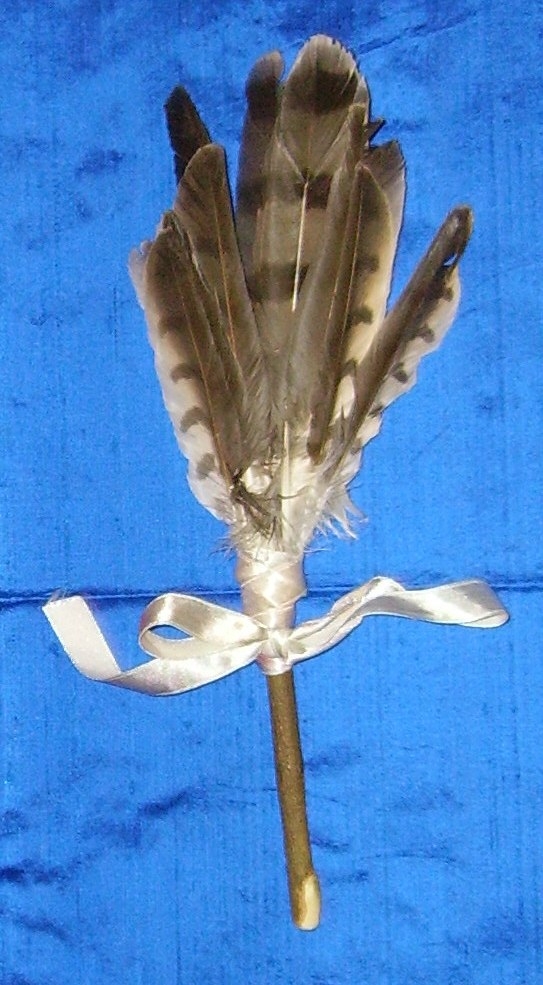
 piece of the special “Glastonbury thorn” which flowers and fruits at the same time on the same tree, collected from a pile of prunings in Glastonbury abby. The same year, I began making ogham sticks, or fews from the 20 sacred woods of the Druids, using Glennie Kindred’s book “Tree Ogham”.  

If you have a short piece of wood, and don’t want to use it as a few, you could make it into the handle of a smudging stick to waft incense or ceremonial smoke over a person, object or room for dedication, clearing or purification. Smudging sticks usually have feathers on the end and these can be gathered from any birds at any time. (I’m not suggesting you go and grab feathers from a bird, but pick them off the ground when you find them lying around!) Attach the feathers to the end of the stick either using string or and elastic band or ribbon or, if you have a large number, you may want to sew thread through the quill part of the feather to draw it into whatever shape you desire. Fasten the feathers and cover the handle with ribbon. I tie a bow at the end to ensure I have something to hang the smudge stick up with!

Then I became interested in larger “sticks” and started to sandpaper them to see what happened. What I discovered is that the more you sandpaper, the smoother the wood becomes until it has a wonderful silky feel when you touch it. If you coat the sanded wood with sunflower oil, this polishes the wood and gives it an even better finish. What actually happened was that I had a jar of home made calendula salve (double infused oil thickened with beeswax) with me when I was sanding and rubbed some in to see what happened. You would not believe how it changes the colour of the finished wand. Gorse is a wonderful one to work with, the dead wood turns from light brown to honey and the live wood, if you’ve sanded it with the bark on goes the most gorgeous shade of green, white and brown which resembles a snake skin.

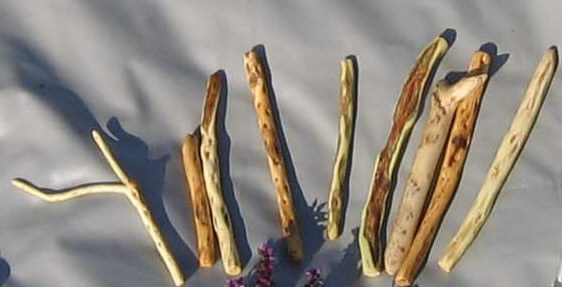
You can make wands with both green and dry wood, depending on what you’ve got to hand and whether you want to work with it with the bark on or off. It’s easier to remove the bark when the wood is green rather than when it’s dry. If you want to work with dry wood, put it inside somewhere and let it dry out for up to five weeks or more. Willow will remain wet for over a year because if you stick a stick into the ground, it will grow. I have a flourishing willow hedge in the Sanctuary which is made from pollarded branches cut down in November 2005 and left during the winter time on the ground. My father trellised the fence for me in April 2006 and they sprouted almost immediately. 

Wands

The length of a wand is historically the distance from your elbow to your longest finger. You can cut to size when you start working on it. A wand doesn’t have to be straight and it doesn’t have to be a single branch, it can curve and twist and have Ts or Ys at the end depending on what the piece of wood tells you to do. I only tend to use my penknife when I’m working on knots in the wood, or to shape the tip or handpiece. You can also use inexpensive files to make whirls or spirals in the wood – again…what you feel called to do. 

The sanding does take time and it can be quite hard work. Start with the coarsest grain of sandpaper and work up to the finest sandpaper you have. It’s using more than one grade which really makes the wood smooth. Once you are satisfied with the smoothness – you tend to get mesmerised and can’t stop stroking the wood! – take some plain sunflower oil or herbal infused oil or salve if you have some and smooth it on until the wood stops soaking it up. 
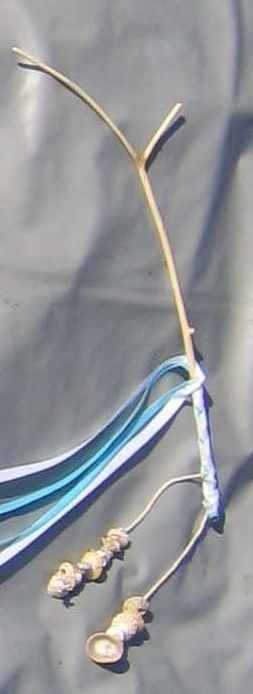
You just put a little on your fingers and keep rubbing.

When you’ve finished, you can decorate your wand with whatever you wish, but I would keep to fairly natural materials. I have made smudging sticks with ribbons and feathers I’ve collected but you could thread seashells or glue in crystals if you really wanted to. (I don’t know how to handle glue, so I don’t tend to do anything which can’t be tied!

Each wood has a different spiritual property and a different affinity for the time of year. You can enhance what you want your wand for by using herbal oils which have the relevant property you’re looking for. I love yew, not only for it’s colour, but because it is the gateway between this world and the spirit world and since I do a lot of work with people who are dying or bereaved, it’s a very special wood for me. When my friend lost his mother last year I made him two fews (ogham sticks), one of live gorse for hope and one of yew finished with comfrey oil, so that he could sit and stroke the wood and find comfort in their touch. This year I sent him an elder few, because elder helps with change. I made myself a necklace of elder beads finished with rosemary infused oil for aiding “life rites” and it’s adorned with kestrel feathers to help with farseeing.

Staves

Staff making is similar but different. Your staff should be a thickness which is comfortable to hold and a length you feel happy with. It can be shoulder or head height or taller depending what you’re going to use it for. I have a large hazel staff with runes inscribed on it for rituals, a much shorter blackthorn staff with a monkjack deer antler on the top which I use occasionally for stick dancing in Tai Chi and a lighter willow staff which I use most of the time when we’re working with sticks. Do remember that substantial staves can kill someone.

 When you’ve chosen your piece of wood, leave it to dry for several months, then sand it down with the bark still on it. It doesn’t need to be as smooth as a wand, just until you feel happy with the smoothness. If you want to decorate it with carving or runes, do this now. Rune carving is much more difficult than you think – take care not to cut yourself. The runes can then be coloured in with a red dye of some description. If you can make some out of madder or dyers woodruff all the better. Once you have decorated your staff to your satisfaction, it then needs to be sealed in some way either with varnish or a clear wood sealant. Leave it to dry somewhere away from dust and particles which may adhere to the sticky surface. It can then be decorated with hag stones, seashells, crystals or whatever you fancy.

 My family now sigh a great deal when they see the number of different “sticks” I have lying around the house. I use them for workshops with my healer development group and people seem to love using them as a meditation aid.

I hope all this helps you to feel confident to try making something. It’s great fun and very restful. You may want to use a woodworking apron or a piece of old sheet over you when you’re making it as you can get very dirty while you’re sanding!

Have fun and let us know if you make anything!

Sarah


Content Copyright © 2006 - Springfield Sanctuary. All rights reserved